Scene 1: Stock Photo
I found that:
- The amount of information in the image is very large. While universal templates can help you generate a passable image, it's difficult to generate an entirely satisfactory one.
- To create a high-scoring image requires not only prompt engineering but also some aesthetic knowledge. The use of different scene parameters varies, so sometimes using templates can be too rigid. Therefore, instead of directly teaching everyone about so-called universal templates, I want to teach everyone how to write good text prompts through actual scenes because the information you give to the model for different scenes is not the same.
Moreover, I believe that knowing why something works is far more important than just knowing how it works. When you know why something works and encounter new situations in your work later on, you will be able to deconstruct what's needed in the prompt rather than blindly applying a template.
Finally, there are many types of picture scenarios and I will try my best to share those that can be used in your daily work. My hope is that AI will improve your work efficiency rather than being just another disposable toy.
The opening introduction for Text Prompt discusses Midjourney V5's significant improvement in Stock Photo scenarios.
What are Stock Photos?
Stock photos refer directly to images from photo libraries which can usually be found on various stock photo websites and are often taken by photographers or designers. Some images may require payment due to copyright reasons if they need usage rights.
Most users who use stock photos are design companies or advertising agencies; these types of pictures should look familiar such as classic handshake photos between two people.

I think AI-generated images are a big hit to the stock photo library, and the V5 version basically meets my Stock Photo needs.
Tip 1: Copy
I think the best way to learn how to use a picture prompt is similar to learning how to draw, and the best way to learn is not to use a template directly.
The best way to learn is not to use a template directly, but to copy a real picture, or a picture generated by someone else.
Take the handshake diagram above for example, let's take a closer look at the above diagram, what are the elements in the diagram:
- two hands that are then shaking and appear to be two Asian men.
- both men are wearing suits.
- the background looks like the front door of an office building, where the two men are probably shaking hands and saying goodbye. And the background is deliberately bokeh, or it was taken with a camera.

To summarize again, the general message:
- Subject: Two Asian men in suits shaking hands and saying goodbye
- Scene: office building door
- Image style: stock photo, camera shot.
At this point, we can try to write a prompt
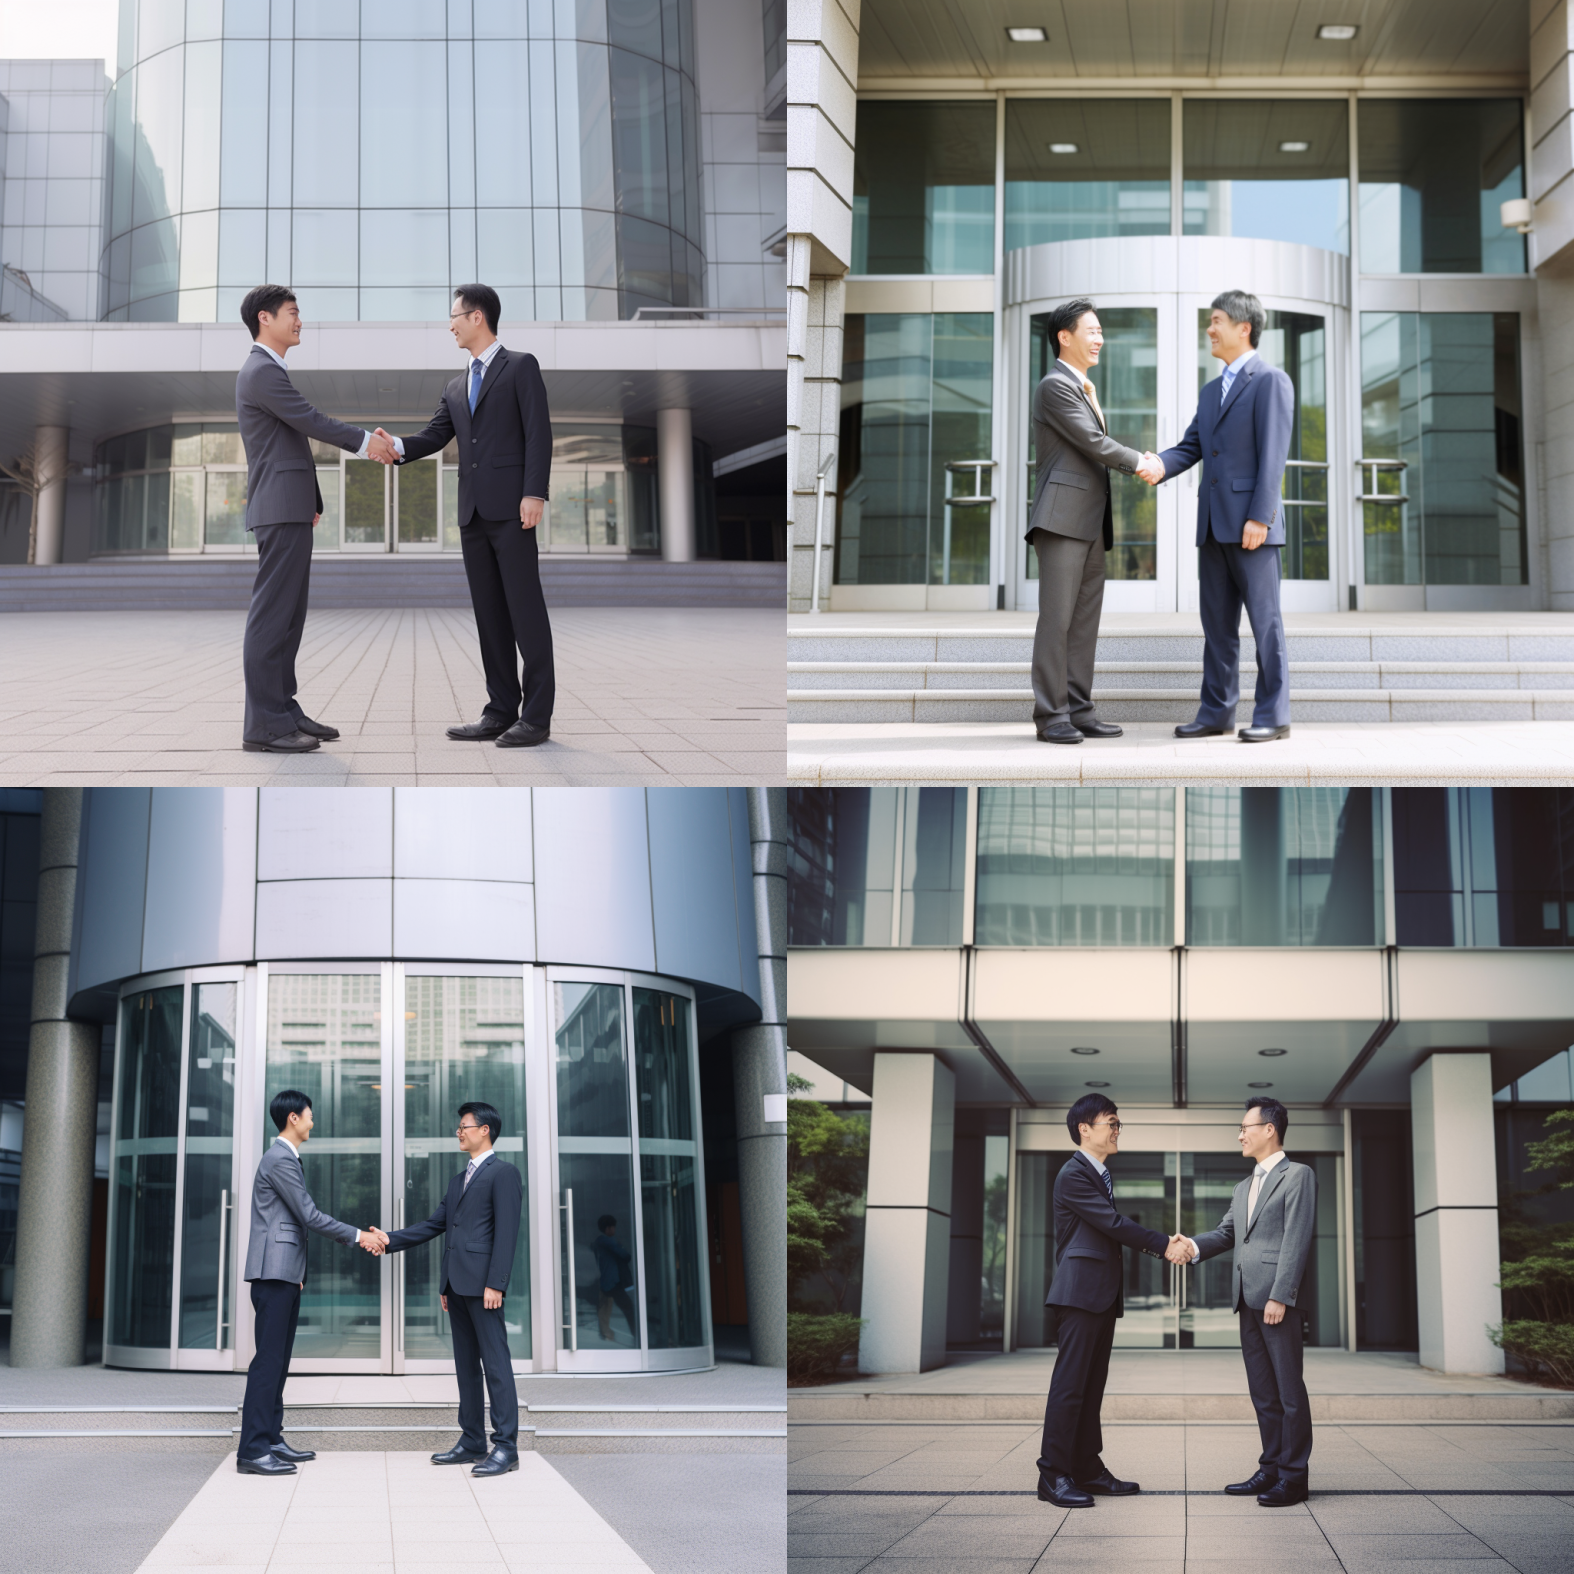
stock photo of two Asian men in suits shaking hands,say goodbye in front of the main entrance of the office building,taken with Canon
The results generated by Midjourney are shown below.
Emm 🤔 It doesn't seem to be what we expected. Don't panic, you're bound to encounter this kind of problem when you first start using Midjourney, it's important to try more.

Let's analyze why Midjourney generated this image. To recap:
- the subject of the picture, or the focus, we only need to "shake hands", not two people.
- The photo mode does not seem to achieve background bokeh? More like an image style, Figure 4 is like an old photo style.
Then we adjust the prompt to increase the focus and background bokeh keywords:
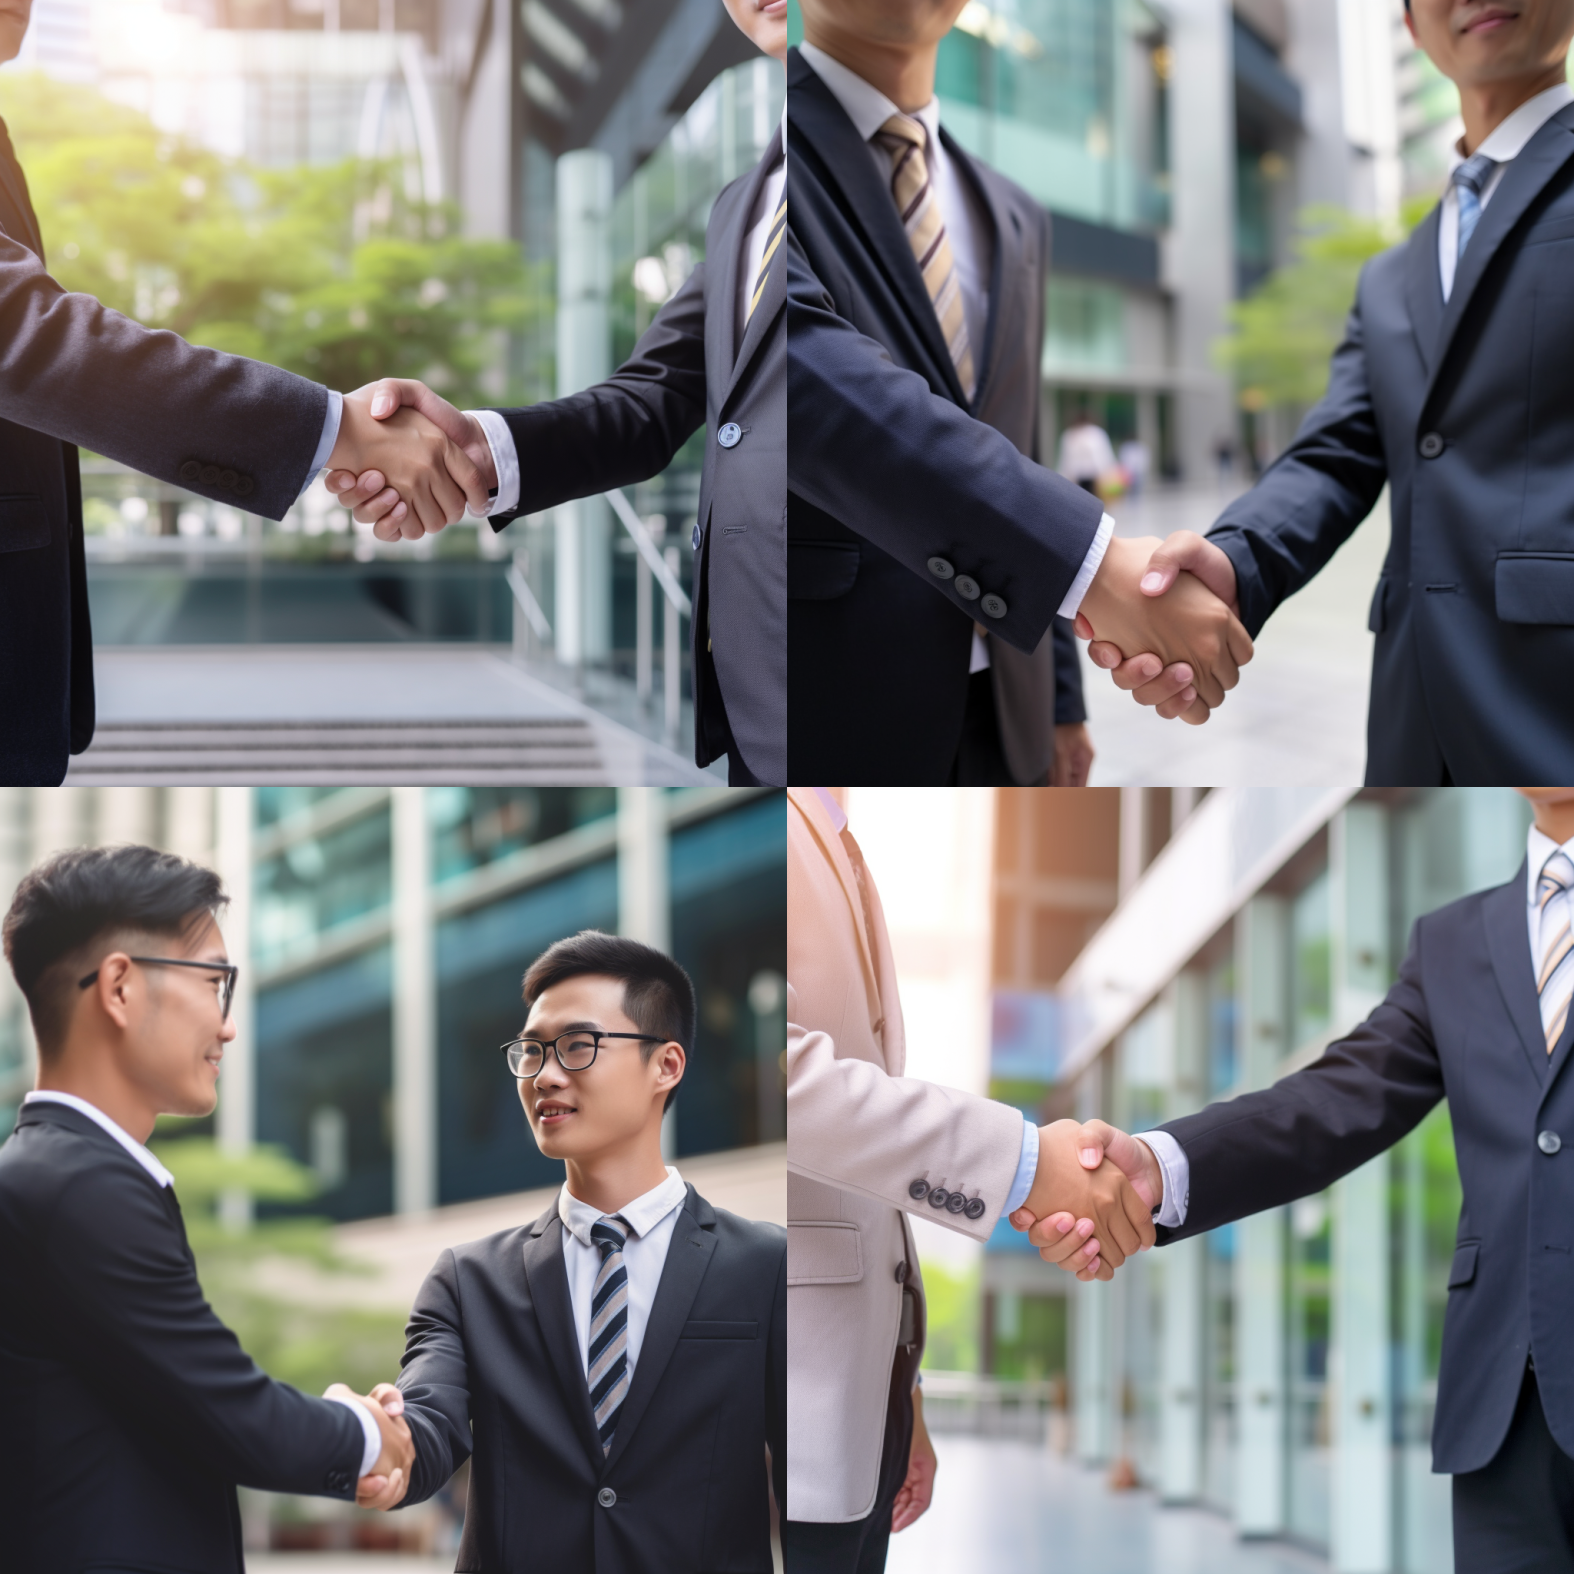
stock photo of two Asian men in suits shaking hands,say goodbye in front of the main entrance of the office building, focus on two hands, taken with Canon, background bokeh
Let's take a look at the generated results again. The results are much better now. Figures 1 and 4 basically meet our requirements, while figures 2 and 3 can also meet our needs after being cropped. However, it should be noted that there is still some problem with Midjourney's generation of hands for now. If you look closely at figures 2 and 4, one person has six fingers 😂, but I believe this will be fixed in the future.

So let's summarize the prompt, which is divided into the following parts:

- First part (red line): Describe the subject of the content you want.
- The second part (blue line): describe the background/environment of the subject.
- The third part (yellow line): the location of the focus of the photo.
- The fourth part (green line): the style of the photo or special requirements.
After summarizing, did you conclude a template? 😁
Tip 2: More experiments
The above case, I also want to teach you the second tip: more experiments.
Image generation does not meet the expected situation, do not panic, analyze the problem, and then use the control variable method, one by one to adjust the picture, do not rush, above I wrote prompt there is a place, I do not know if you have noticed, is the beginning of the stock photo, try to delete these two words will be what?
two Asian men in suits shaking hands,say goodbye in front of the main entrance of the office building, focus on two hands, taken with Canon, background bokeh
The generated results also still meet the requirements, and the number of fingers is accurate, indicating that this Stock Image does not have a significant impact on the model.

Tip 3: Make Good Use of the Image2Image Function
In the stock photo scene, there is a very powerful technique called Image2Image.
At first, I thought this method was not suitable for teaching because it has too much impact on the stock photo library 😂
However, in keeping with the principle of tool neutrality and because this technique can actually be used in many scenarios (such as generating avatars), I still think it's necessary to teach everyone.
When using a stock photo library, you will generally encounter several problems:
- The image is copyrighted and cannot be used for commercial purposes or requires payment.
- Some images have been used by many people and others can easily recognize them as stock photos.
- The content of the image roughly meets your requirements but details do not match, such as two Asian men shaking hands in an image that could be improved by changing one person to a woman or adding a black person.
To solve these three problems, the best way is to let AI modify the original image using Image2Image (or Blend) function. The operation steps are as follows:
- Send a nice stock photo you see to Midjourney Bot (I'll use the previous handshake photo as an example)
- Right click to copy the link to the photo and paste it into the input box
- Add a space after the link
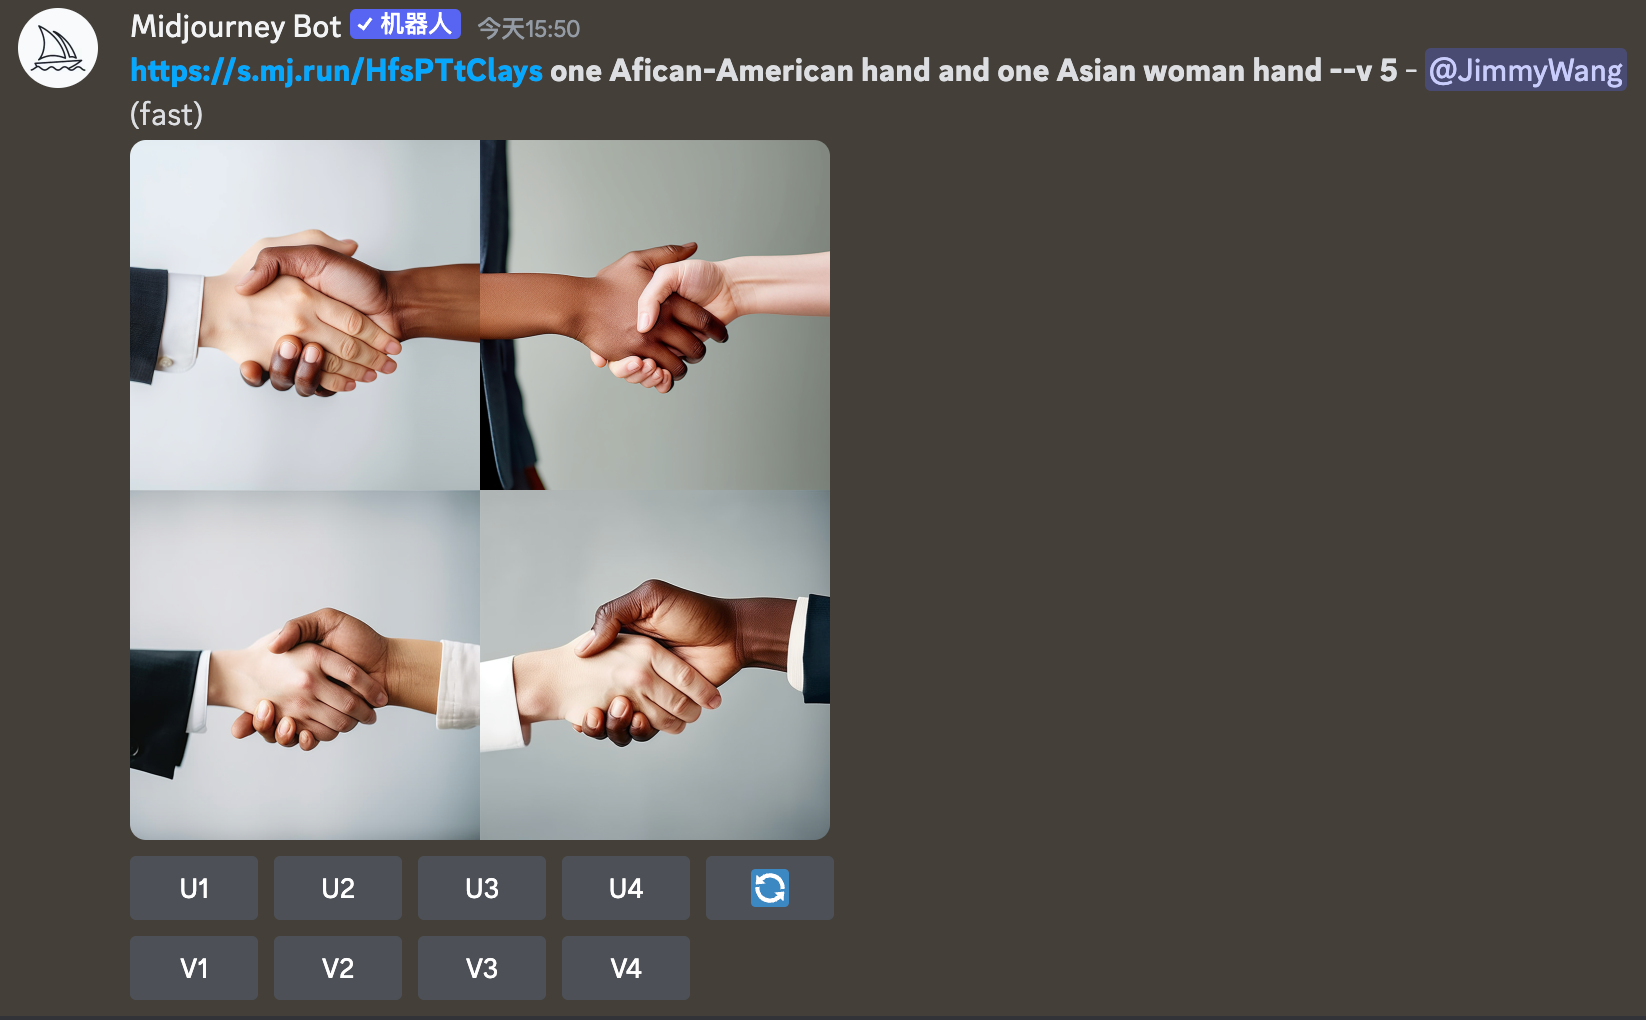
- Then type in what you want, for example, replace one of the hands with a black man and one with a woman:
one Afican-American hand and one Asian woman hand
The generated result is this, I didn't mention any suit in the prompt, and the scene background information, and just said I want an African-American hand, an Asian woman's hand:

Putting aside the 6 fingers issue, isn't this technique very efficient?
However, it should be noted that the blend function (which will be covered in the subsequent tutorials) I found is more suitable for the fusion of two pictures, the picture + text is not very stable, you have to be patient and test it more.